Update!
It turns out that this is a Dell OptiPlex 7010 SFF, not a USFF (as advertised by the eBay seller)!

A Dell OptiPlex 7010 SFF
I recently bought a Dell OptiPlex 7010 Small Form Factor PC from eBay. I was Intending on squeezing two of the spare Seagate Barracuda 4TB 3.5" hard drives I have in it with an SSD boot disk and installing TrueNAS to use it as a file store. It’s a small, quiet machine and should be ideal, but when I was doing my research into what I should buy I think I got the SFF (Ultra Small Form Factor) confused with another Dell OptiPlex machine and it turns out that the SFF model I got can only officially fit a single 2.5" SSD in it, and no 3.5" drives at all. Whoops.
Opening up the machine it turns out that there was actually a 3.5" drive bay and the eBay seller used a tiny amount of hot glue to just glue a 2.5" SSD into the bay rather than using an adapter. Quality. This didn’t help much though, there was still no way of fitting the number of drives I wanted in the machine as it came. Anyway, after removing the SSD, the official Dell drive mounts and the slim CDRW drive I took a look at the situation and figured I could probably rescue this with a bit of 3d printing. Any day that requires you to solve a problem with a bit of 3d printing is generally a good day.
Caveat!
This works for my Seagate Barracuda 4TB drives. They’re slightly thinner than some of the other drives I’ve got, if yours are thicker then it might work for yoiu or it might not.
Risers of the Machine
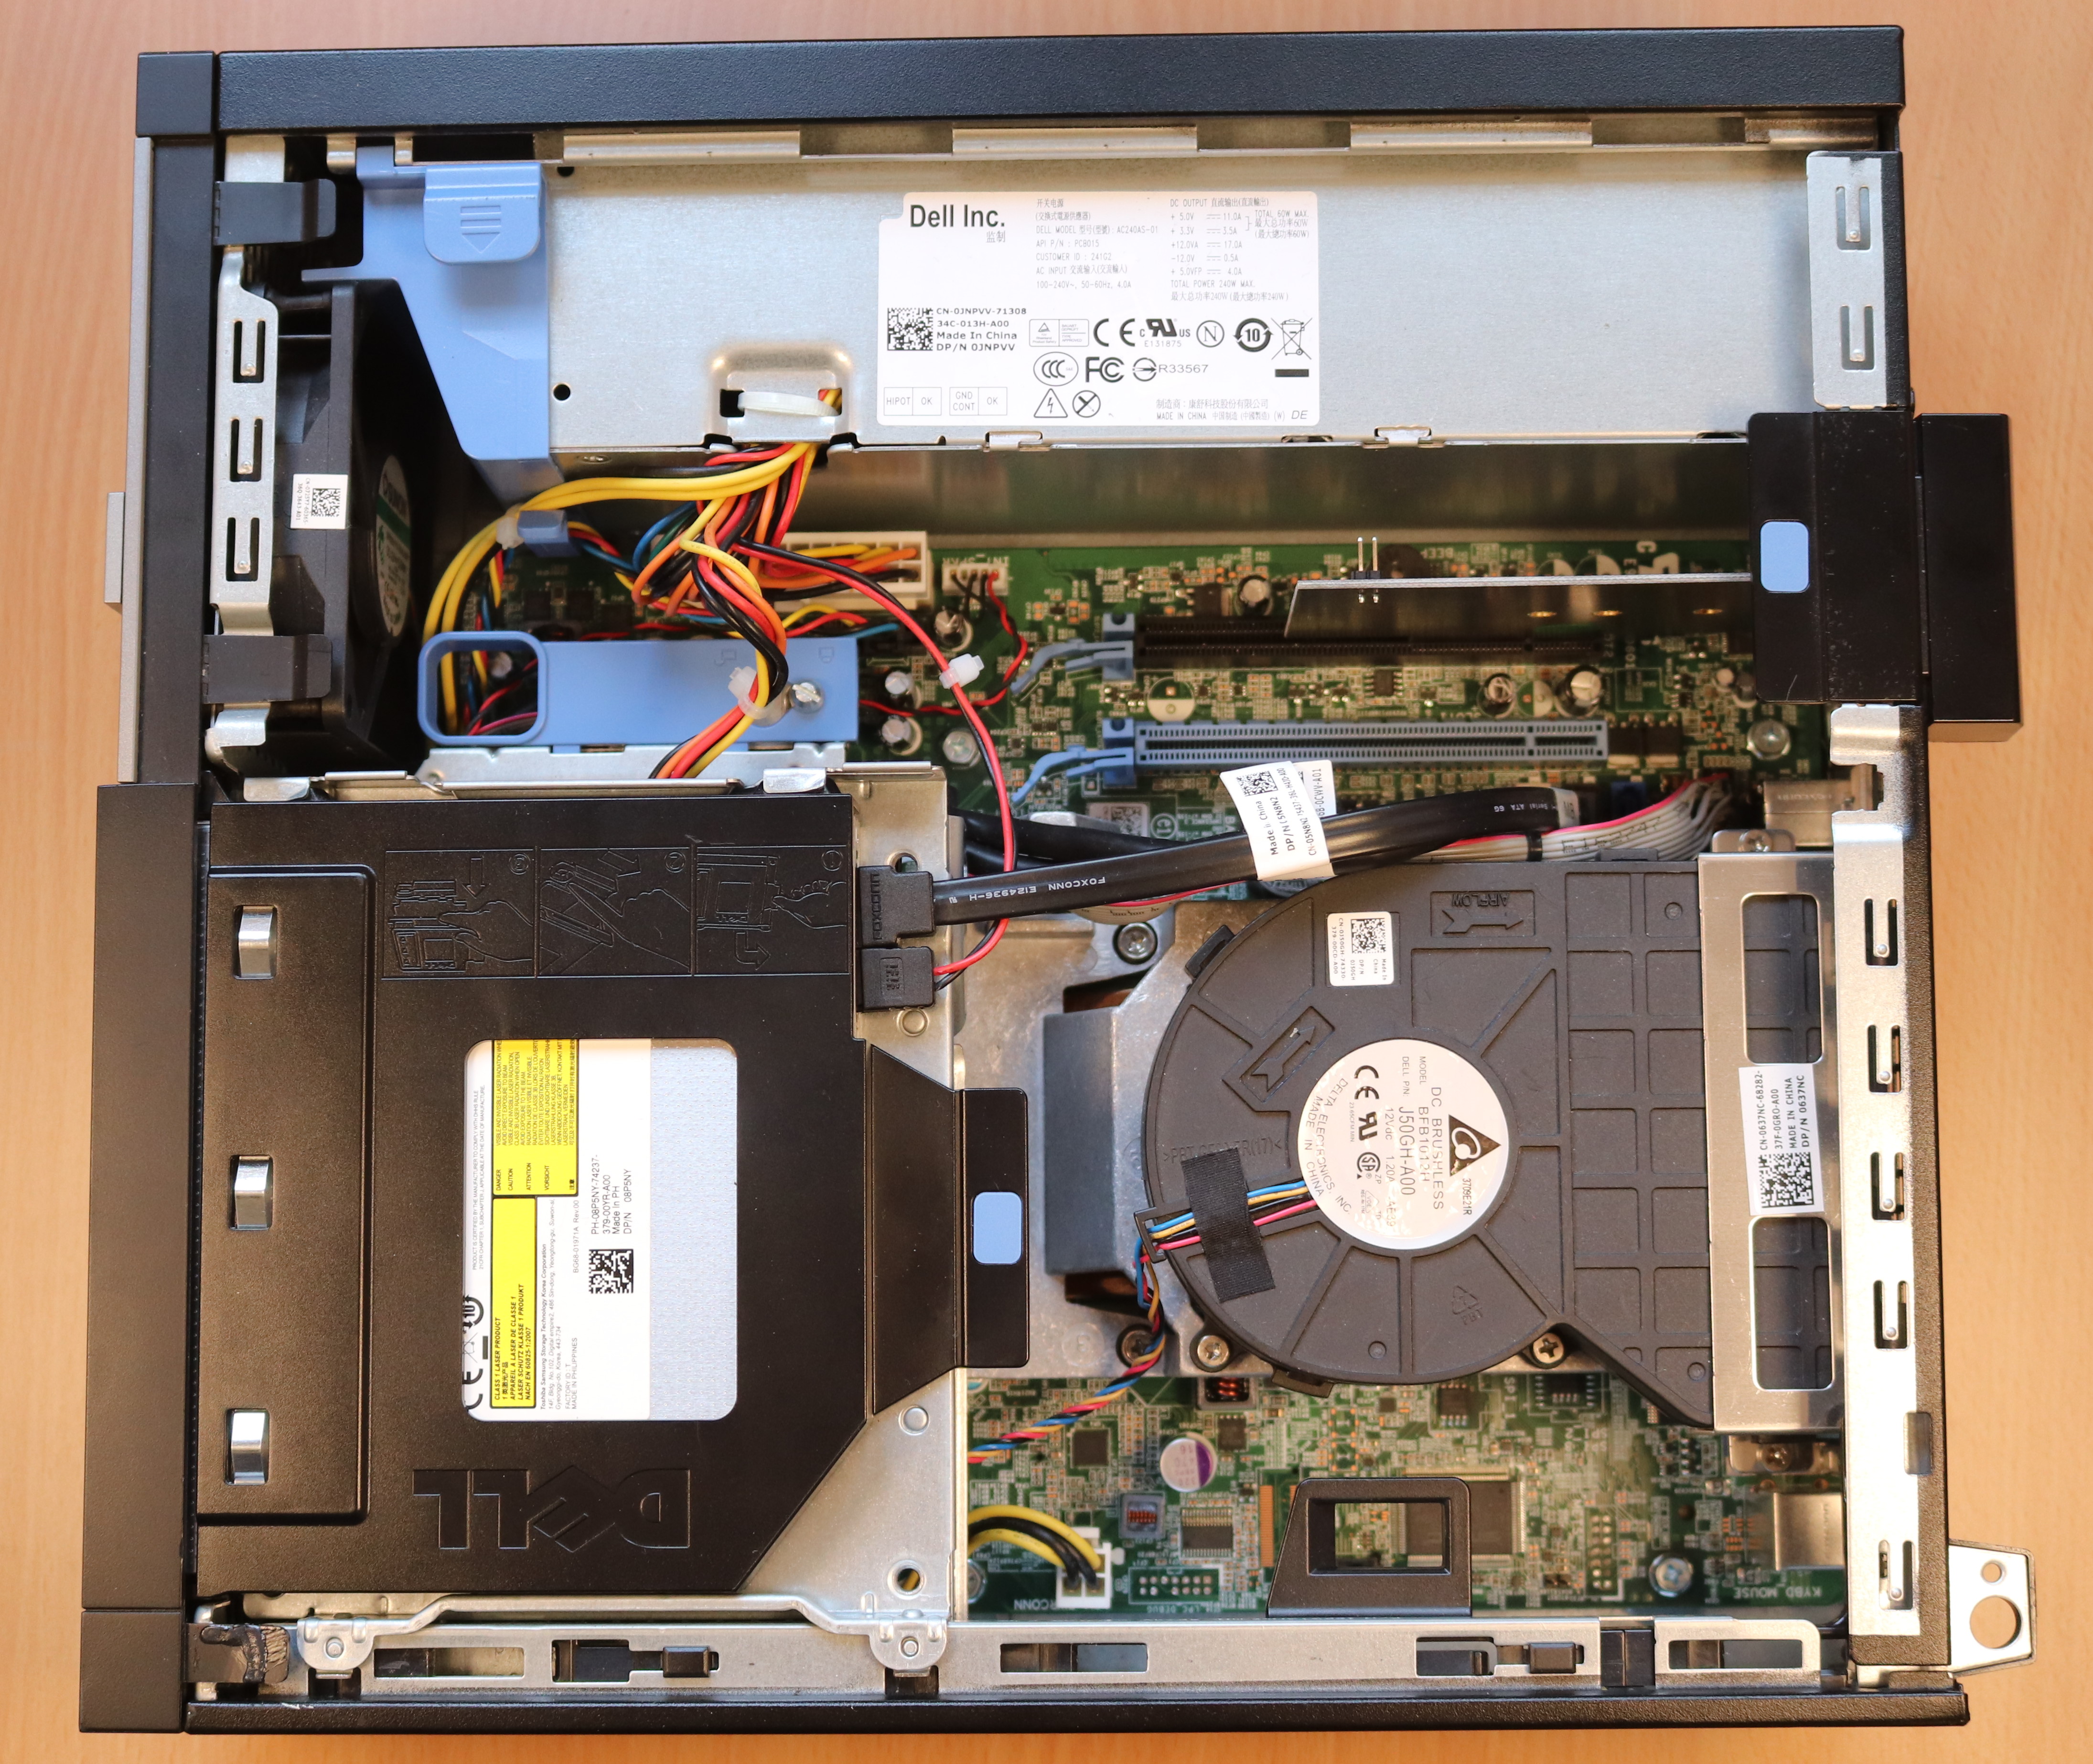
View inside a Dell OptiPlex 7010 SFF, there isn't much room
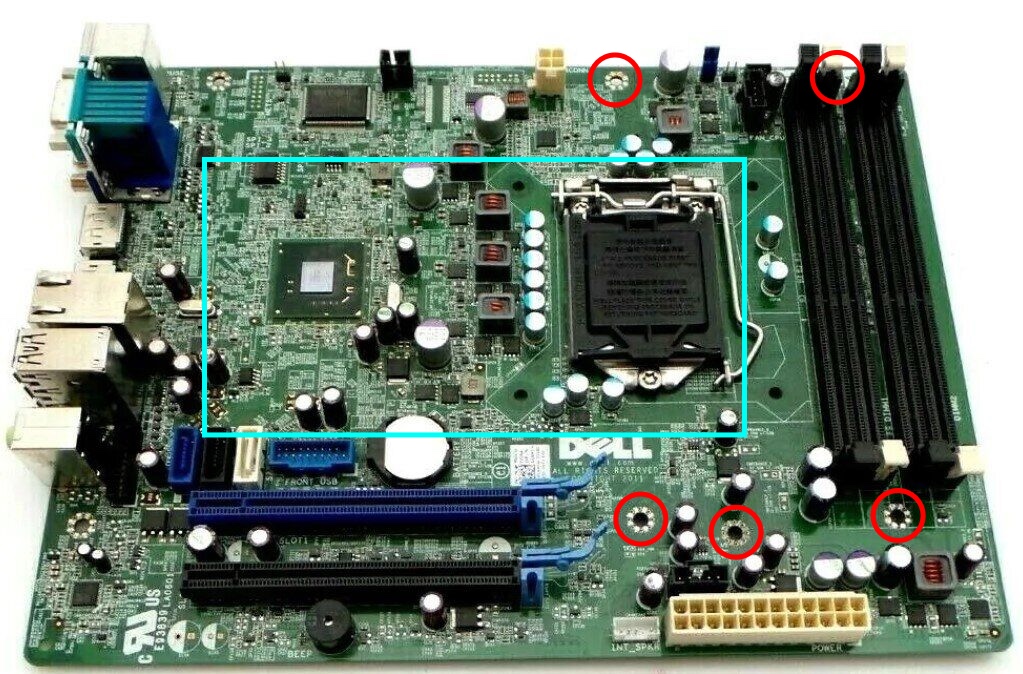
The motherboard. Red circles are candidates for risers, the turquoise square is where the CPU heat sink and fan are
Once the existing mounts had been removed I could see that there were four screws holding the motherboard in place, and an existing riser, all of which could be re-purposed as places to screw a riser which would allow me to mount drives suspended over the RAM. See the image where I’ve marked the locations of these holes with a red circle. The turquoise square is about where the CPU heatsink and fan are, but the heatsink is low profile and draws the heat towards the back of the machine closer to the IO ports where the fan is.
The Curse of the Imperial Menace!
Metric is the best and only measurement system anyone should use, but unfortunately PC manufacturers seem to have settled on imperial for at least the bolt hole sizes I need to use which are 6-32 UNC. The risers I need to incorporate into this design are fairly long too at nearly 40mm. That’s about M3.5 * 40mm in metric, but I couldn’t find any M3.5 risers of the right height, and I can buy 6-32 UNC bolts on eBay easily enough so I bought some of those. You can probably use M3.5 as a substitute.
To Fusion360!
These days my 3d designing tool of choice is Fusion 360 so I opened it up and set to work. Much cursing, and a fair few scrapped prototypes later I came up with this:
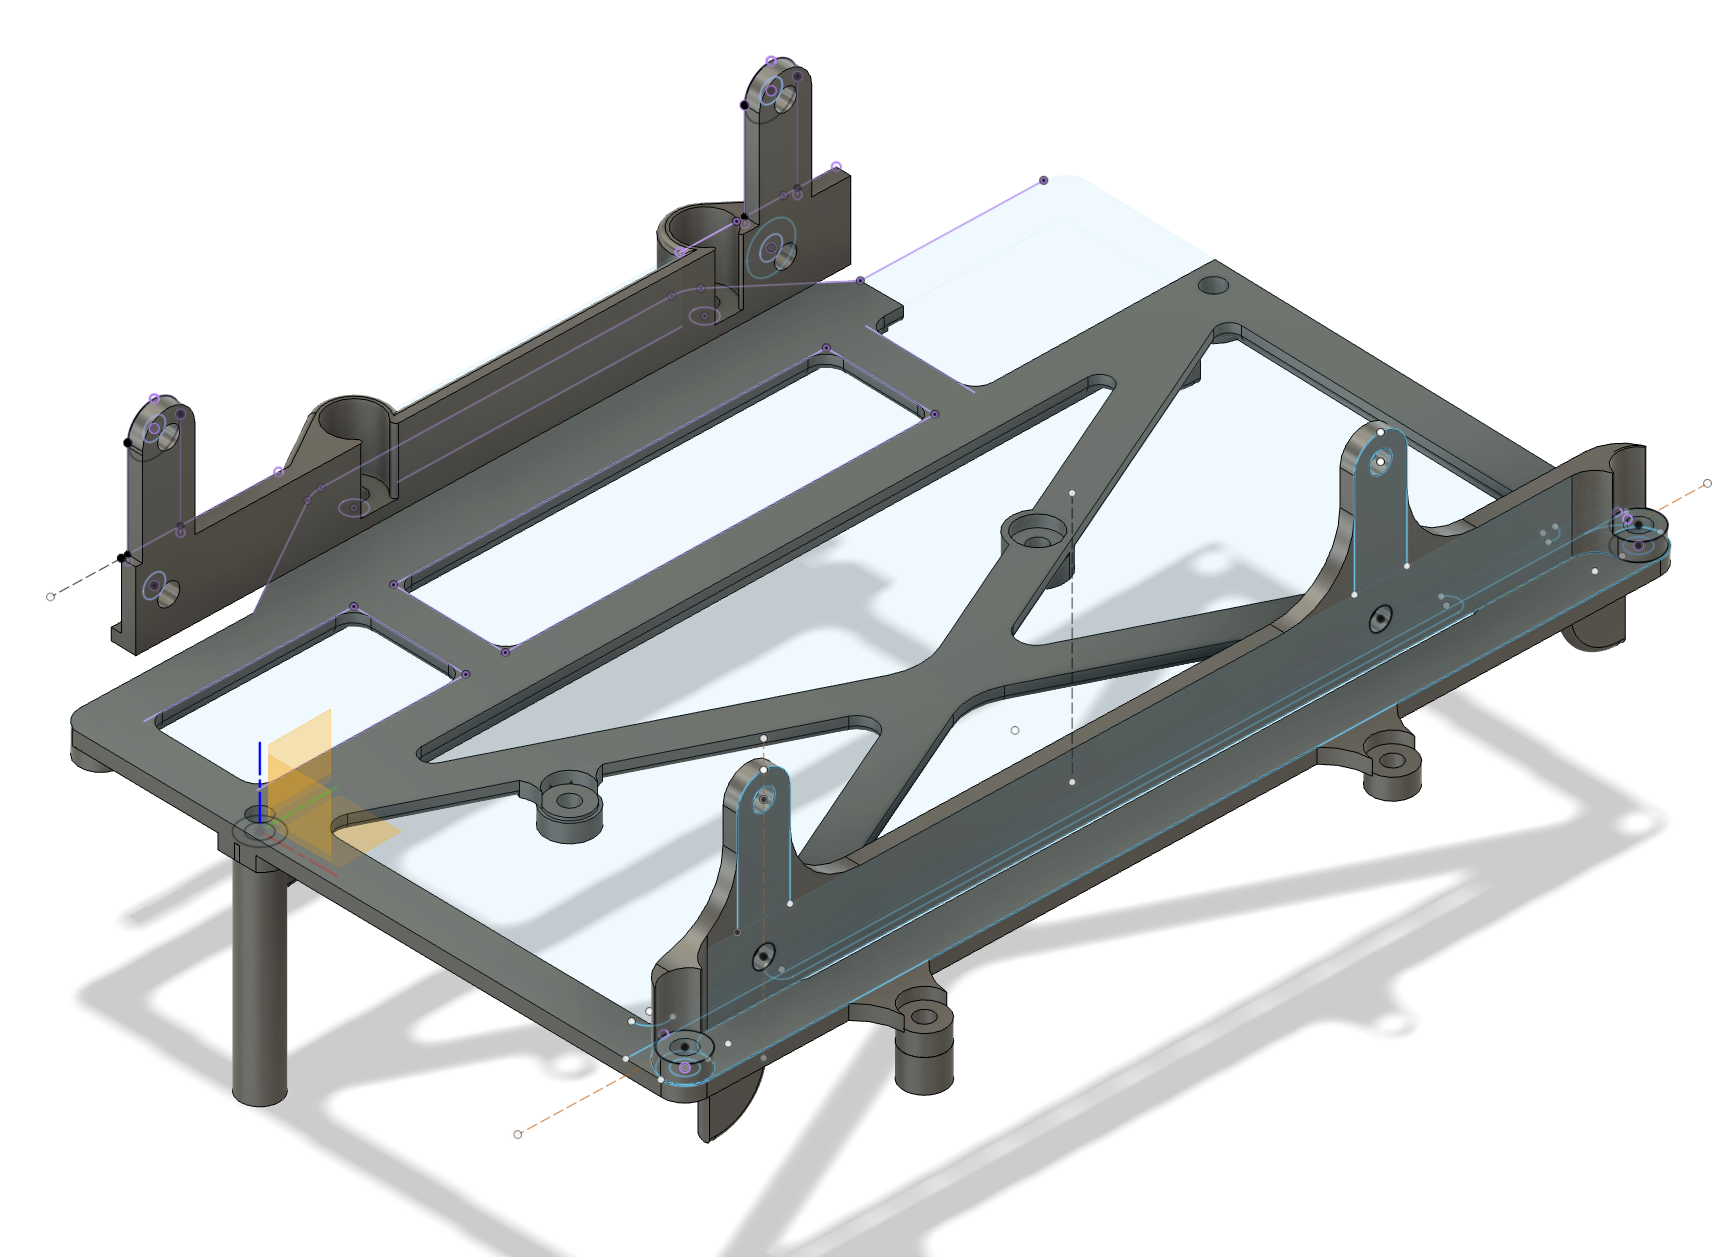
3d design isn't my day job
It’s definitely not going to win any awards for beautiful design, and it’s got some problems, but it works. I could certainly have improved the design further, but I was running out of patience with 3d printing prototypes I had to throw away, and time on my Fusion 360 trial (damn you Autodesk!). Anyway, it’s ugly, it’s flawed, but it works.
The finished mount in action
Here’s the first part of the install showing the “base” of the mount. The SSD is slung underneath with M3 bolts * 12mm, because that was what I had. I should have made the recess for the bolt heads a bit deeper so the bolt heads were further away from the underside of the bottom hard drive, but though it’s tight it doesn’t touch so I’m leaving it.
There is about 5mm clearance between the bottom of the mount and the RAM, and enough clearance between the SSD and the CPU cooler for wires to pass comfortably. The SSD could be mounted about 5mm higher, closer to the bottom of the first hard drive, but I only had 12mm bolts in M3.5 and so had to print spacers.
There are captive nuts on the top-left of this image underneath the base, nearest the front of the case. These were exactly the right size for the nuts I was using, which meant that the nuts stayed in right up until I used any force at all on them like when I was trying to screw a bolt into them. This was infuriating so I epoxied the nuts in place. If I was to do another version of this I’d make the nut traps tighter so the nuts could be safely held in place with a press fit.
The two bolts you can see with two nuts on them used as spacers, these are a flaw in the design. In order to prevent the 50mm bolts I was using from bottoming out I could have used shorter bolts and printed recesses, but I didn’t want to buy more imperial bolts I was never going to use again. I could have printed spacers, but the nuts worked and they were there. In the end I had to remove one of the nuts from the bottom-left most bolt so it didn’t foul the hard drive, but it didn’t bottom out even then so it worked out.

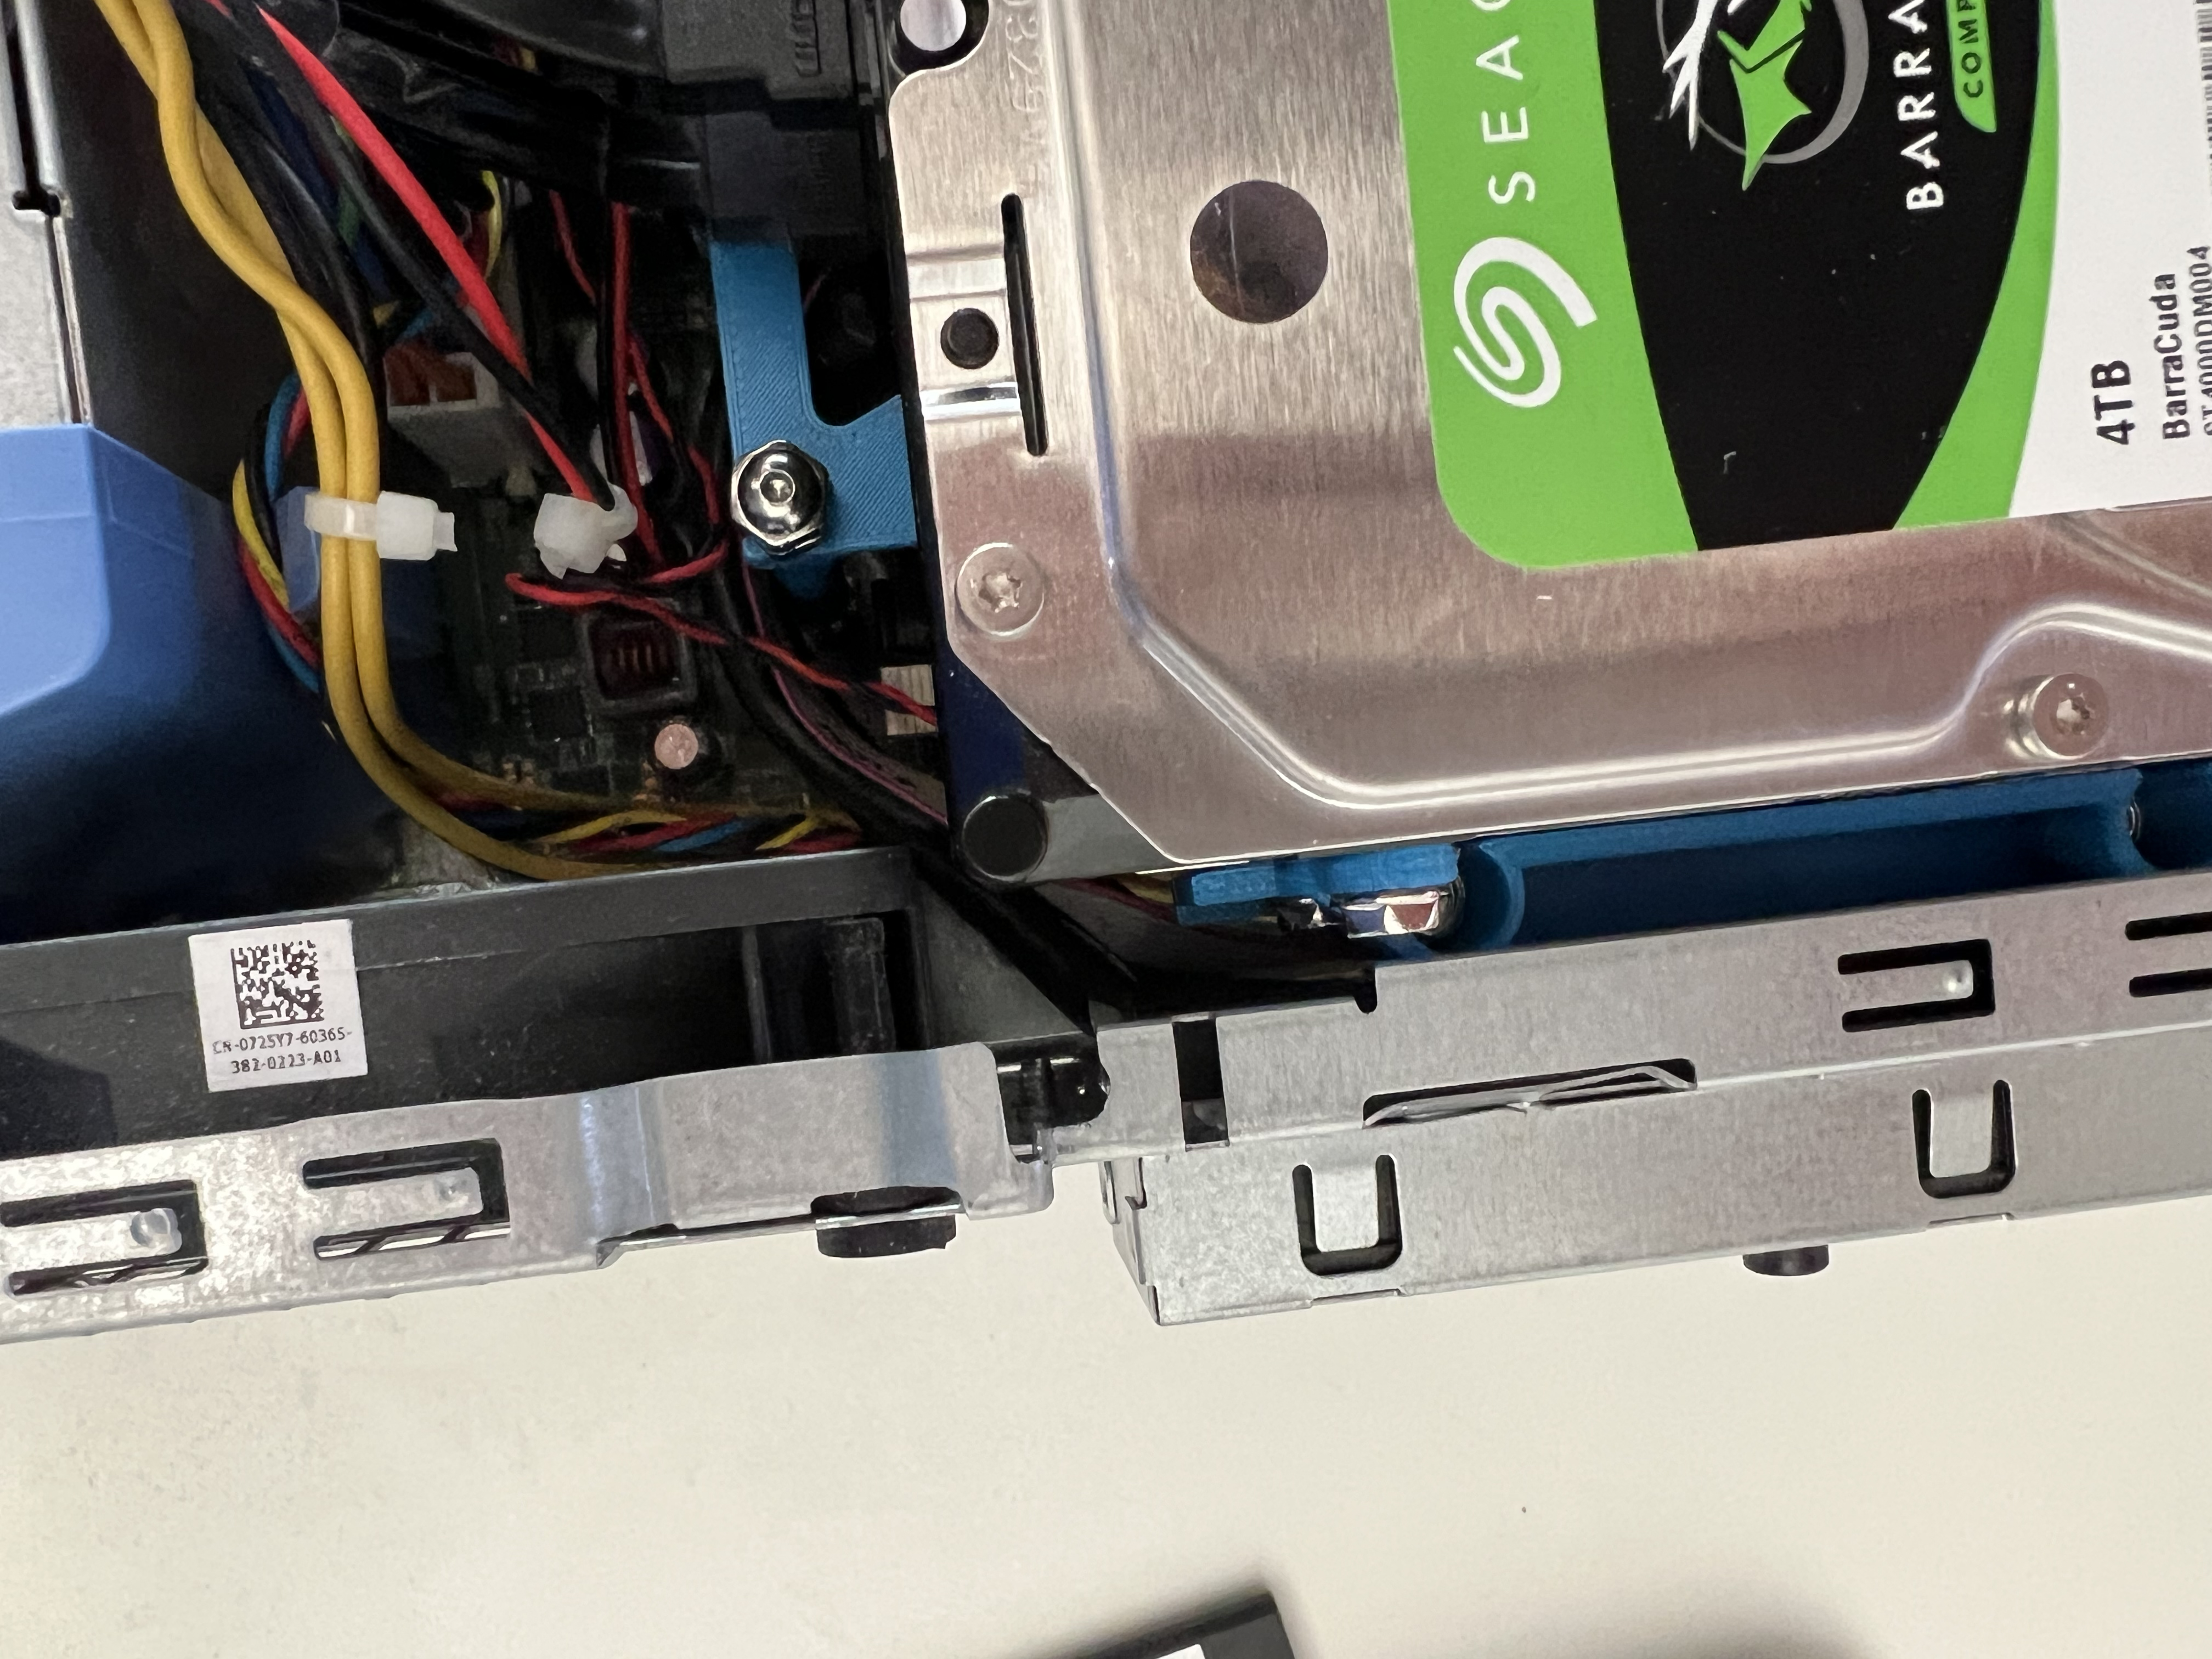
Here you can see the 3.5" hard drives in place. There is a gap between the two drives to allow for air flow.
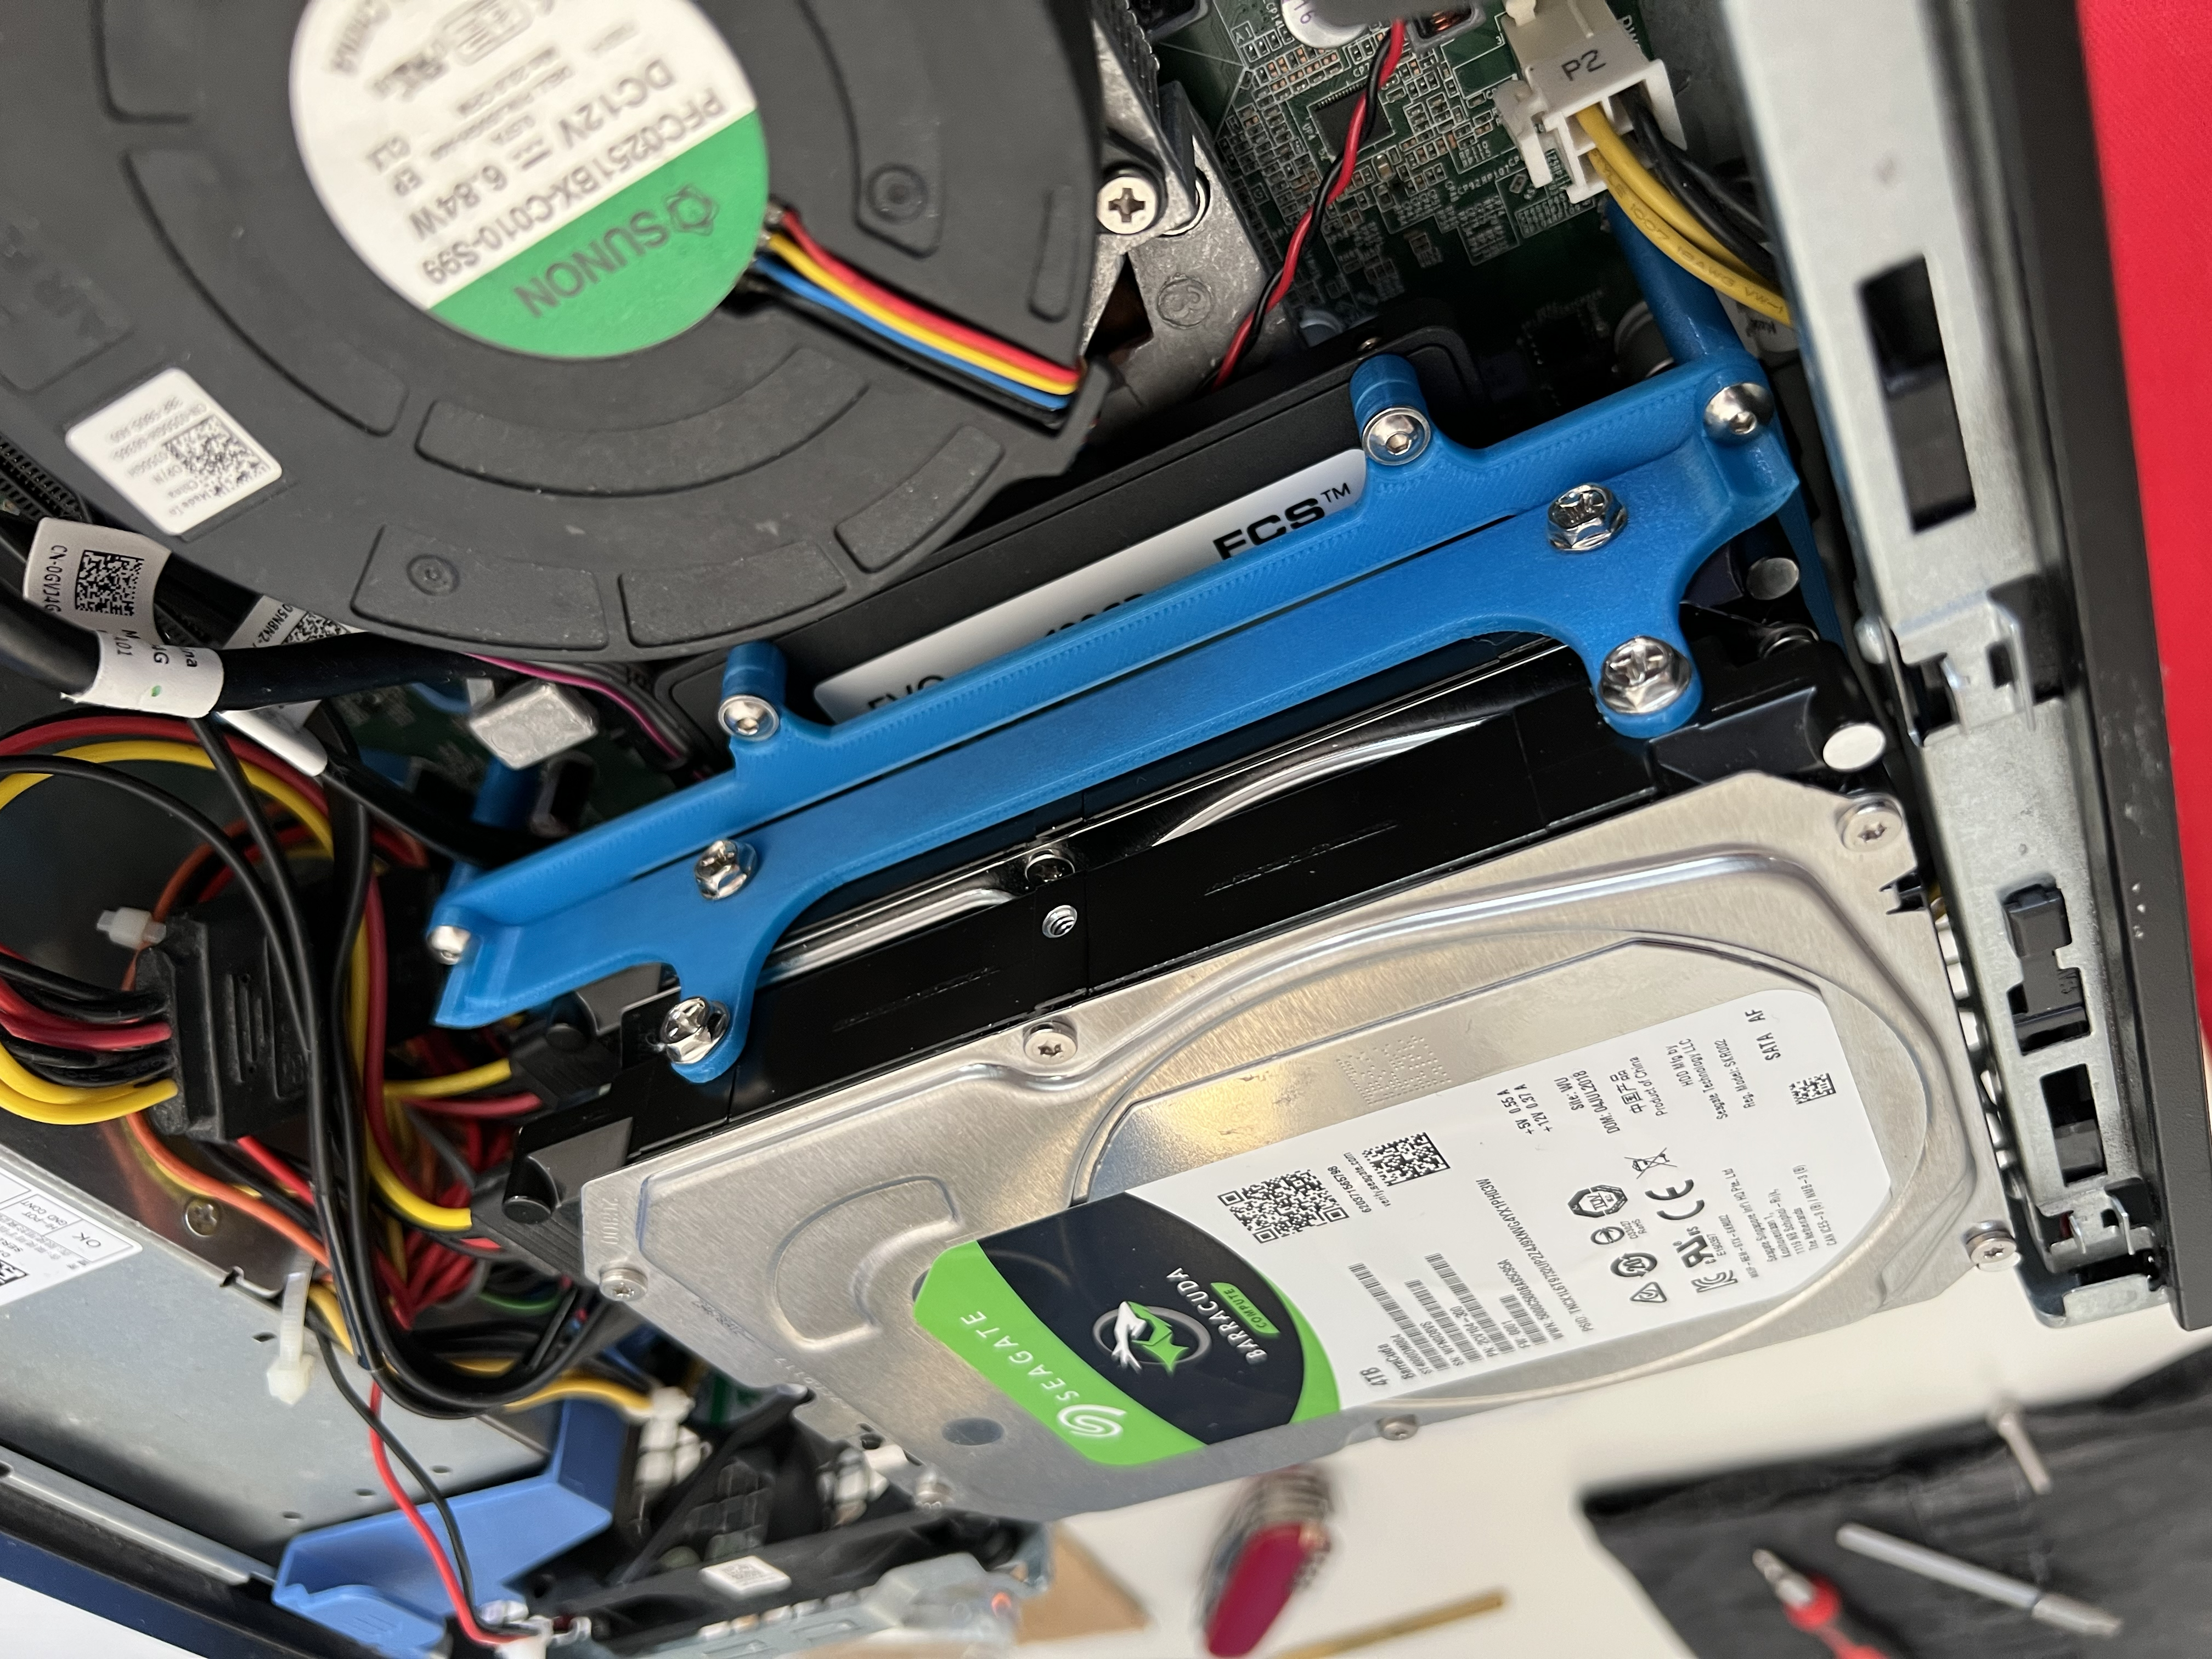
Here you can see how tight it is near the case fan, the tolerances in this design are pretty tight. I couldn’t shift the hard drives further away from the front of the case/the case fan because the latch in the removable panel on the case prevents them from moving backwards in the case.
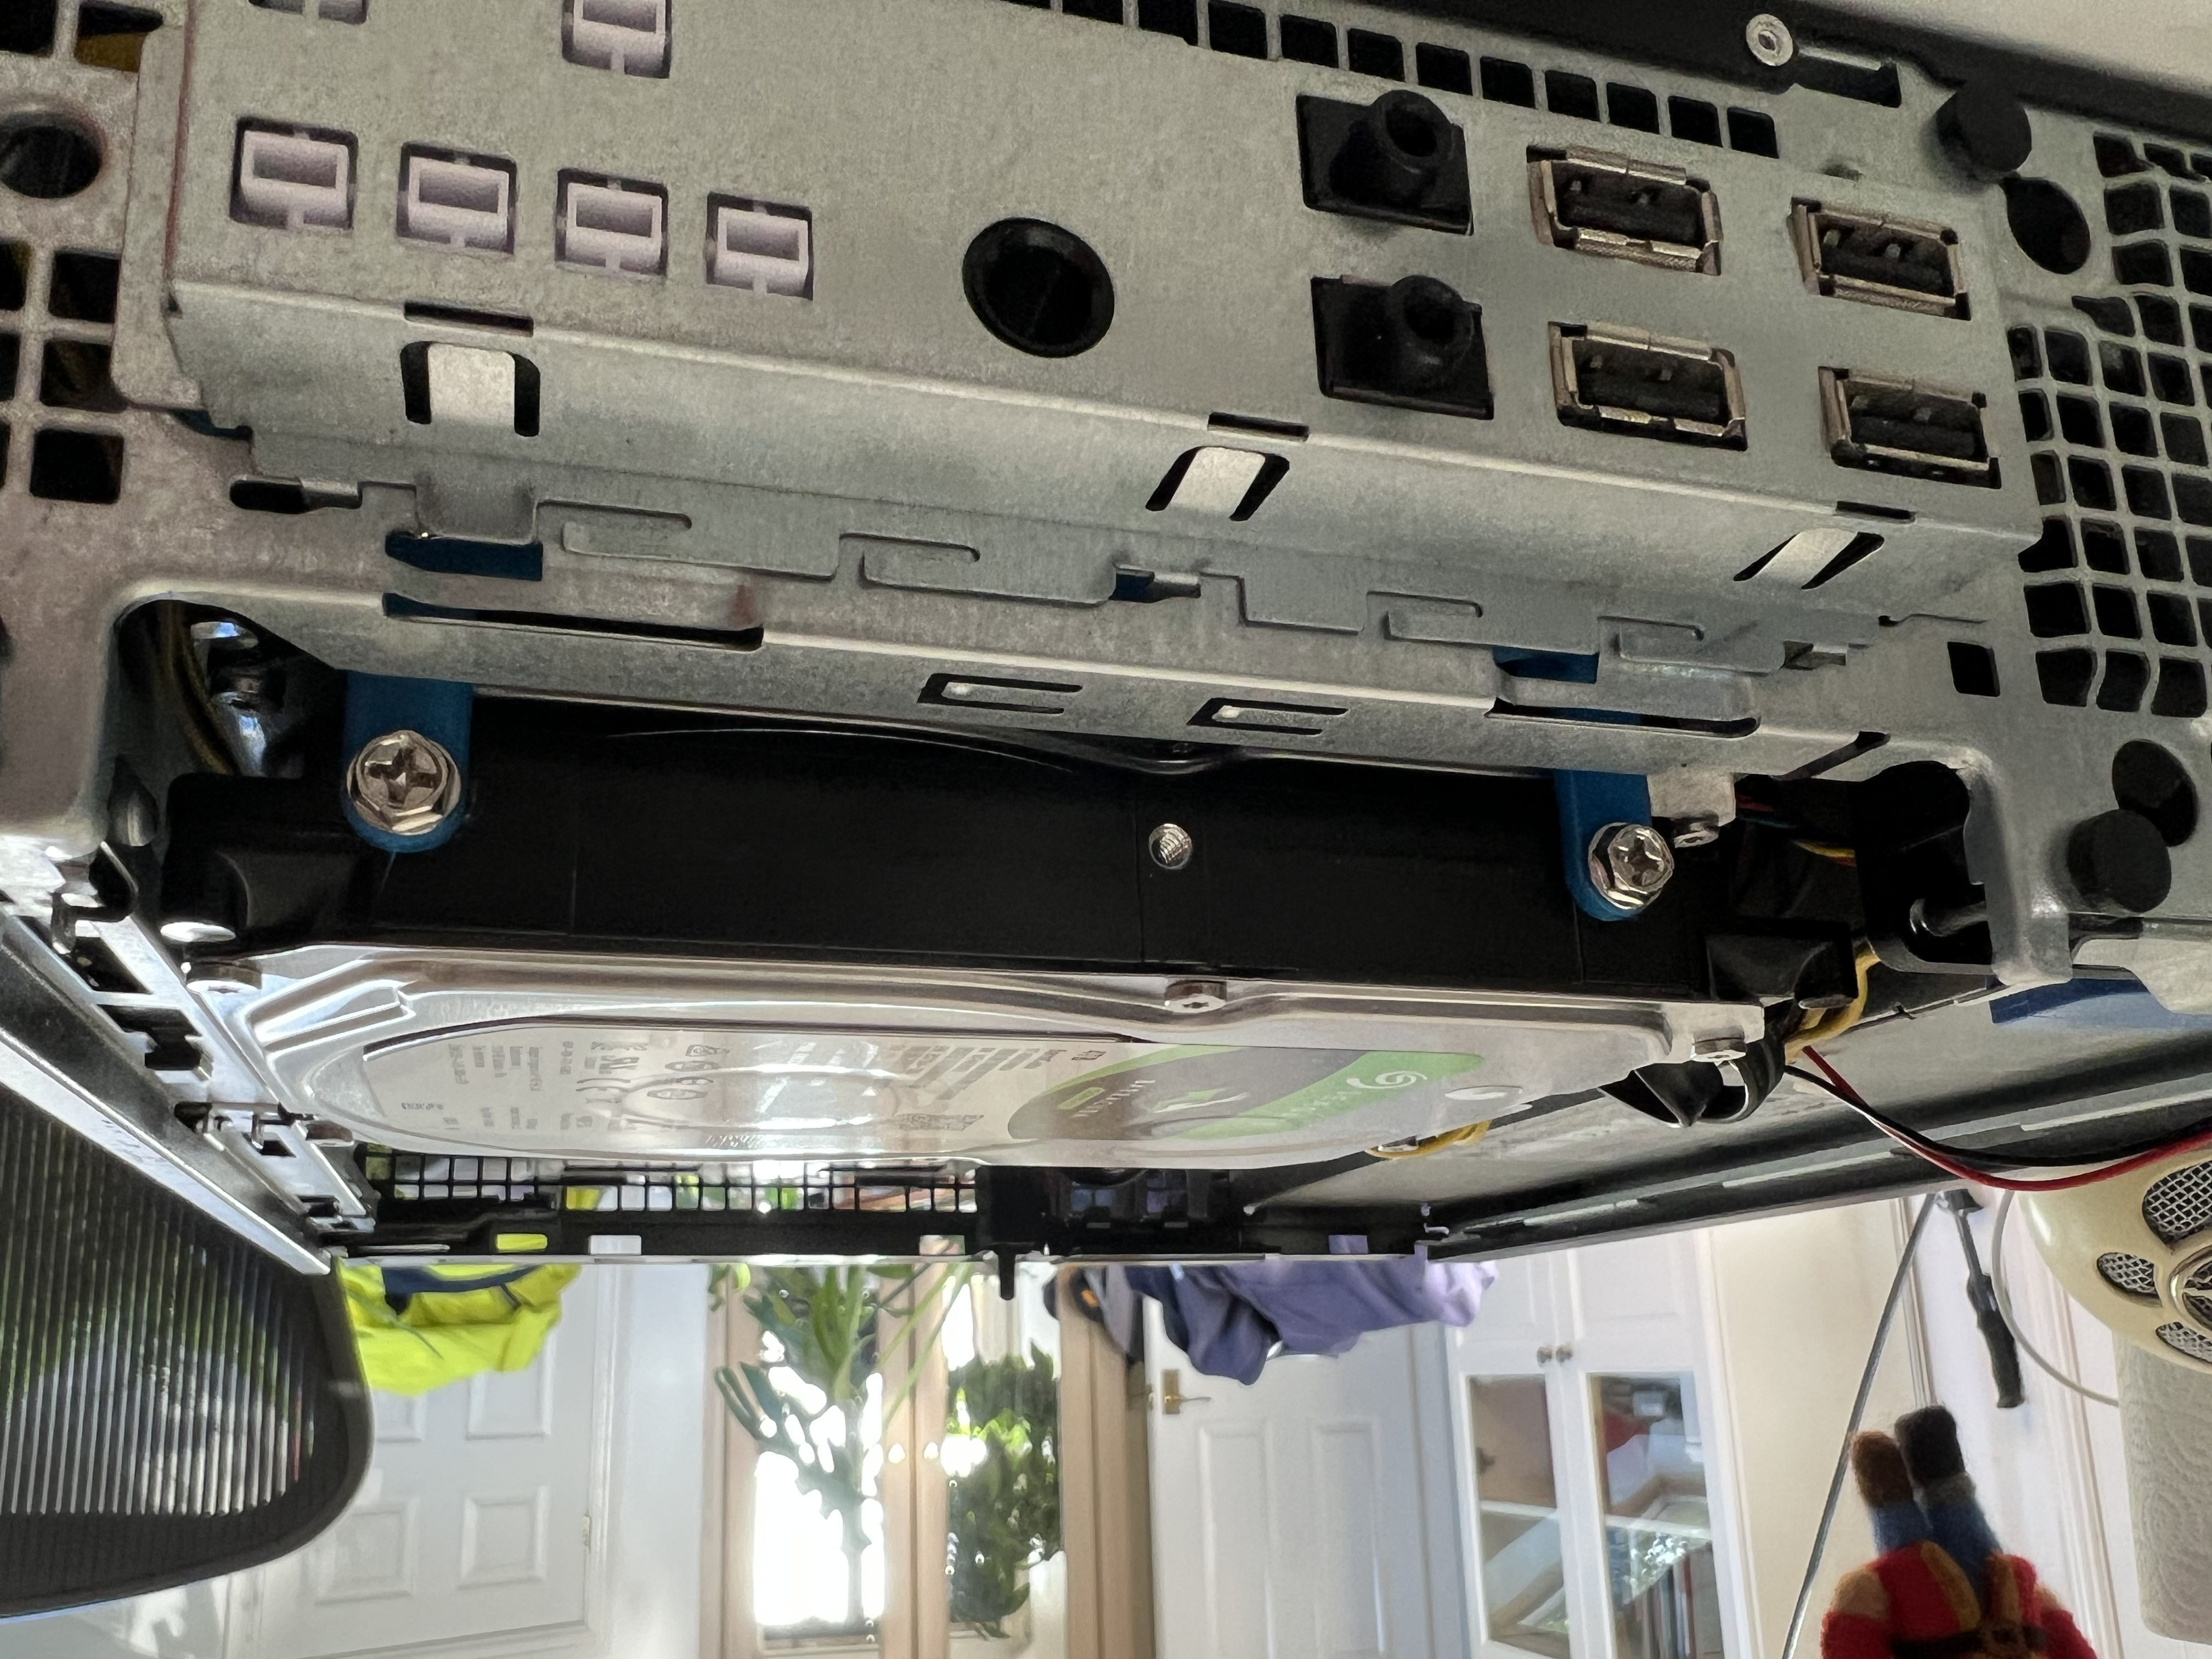
The front of the case looking in through the old CDRW slot. It doesn’t look like it but there is a mm or two clearance between the top of the top hard drive and the case when the lid is on.
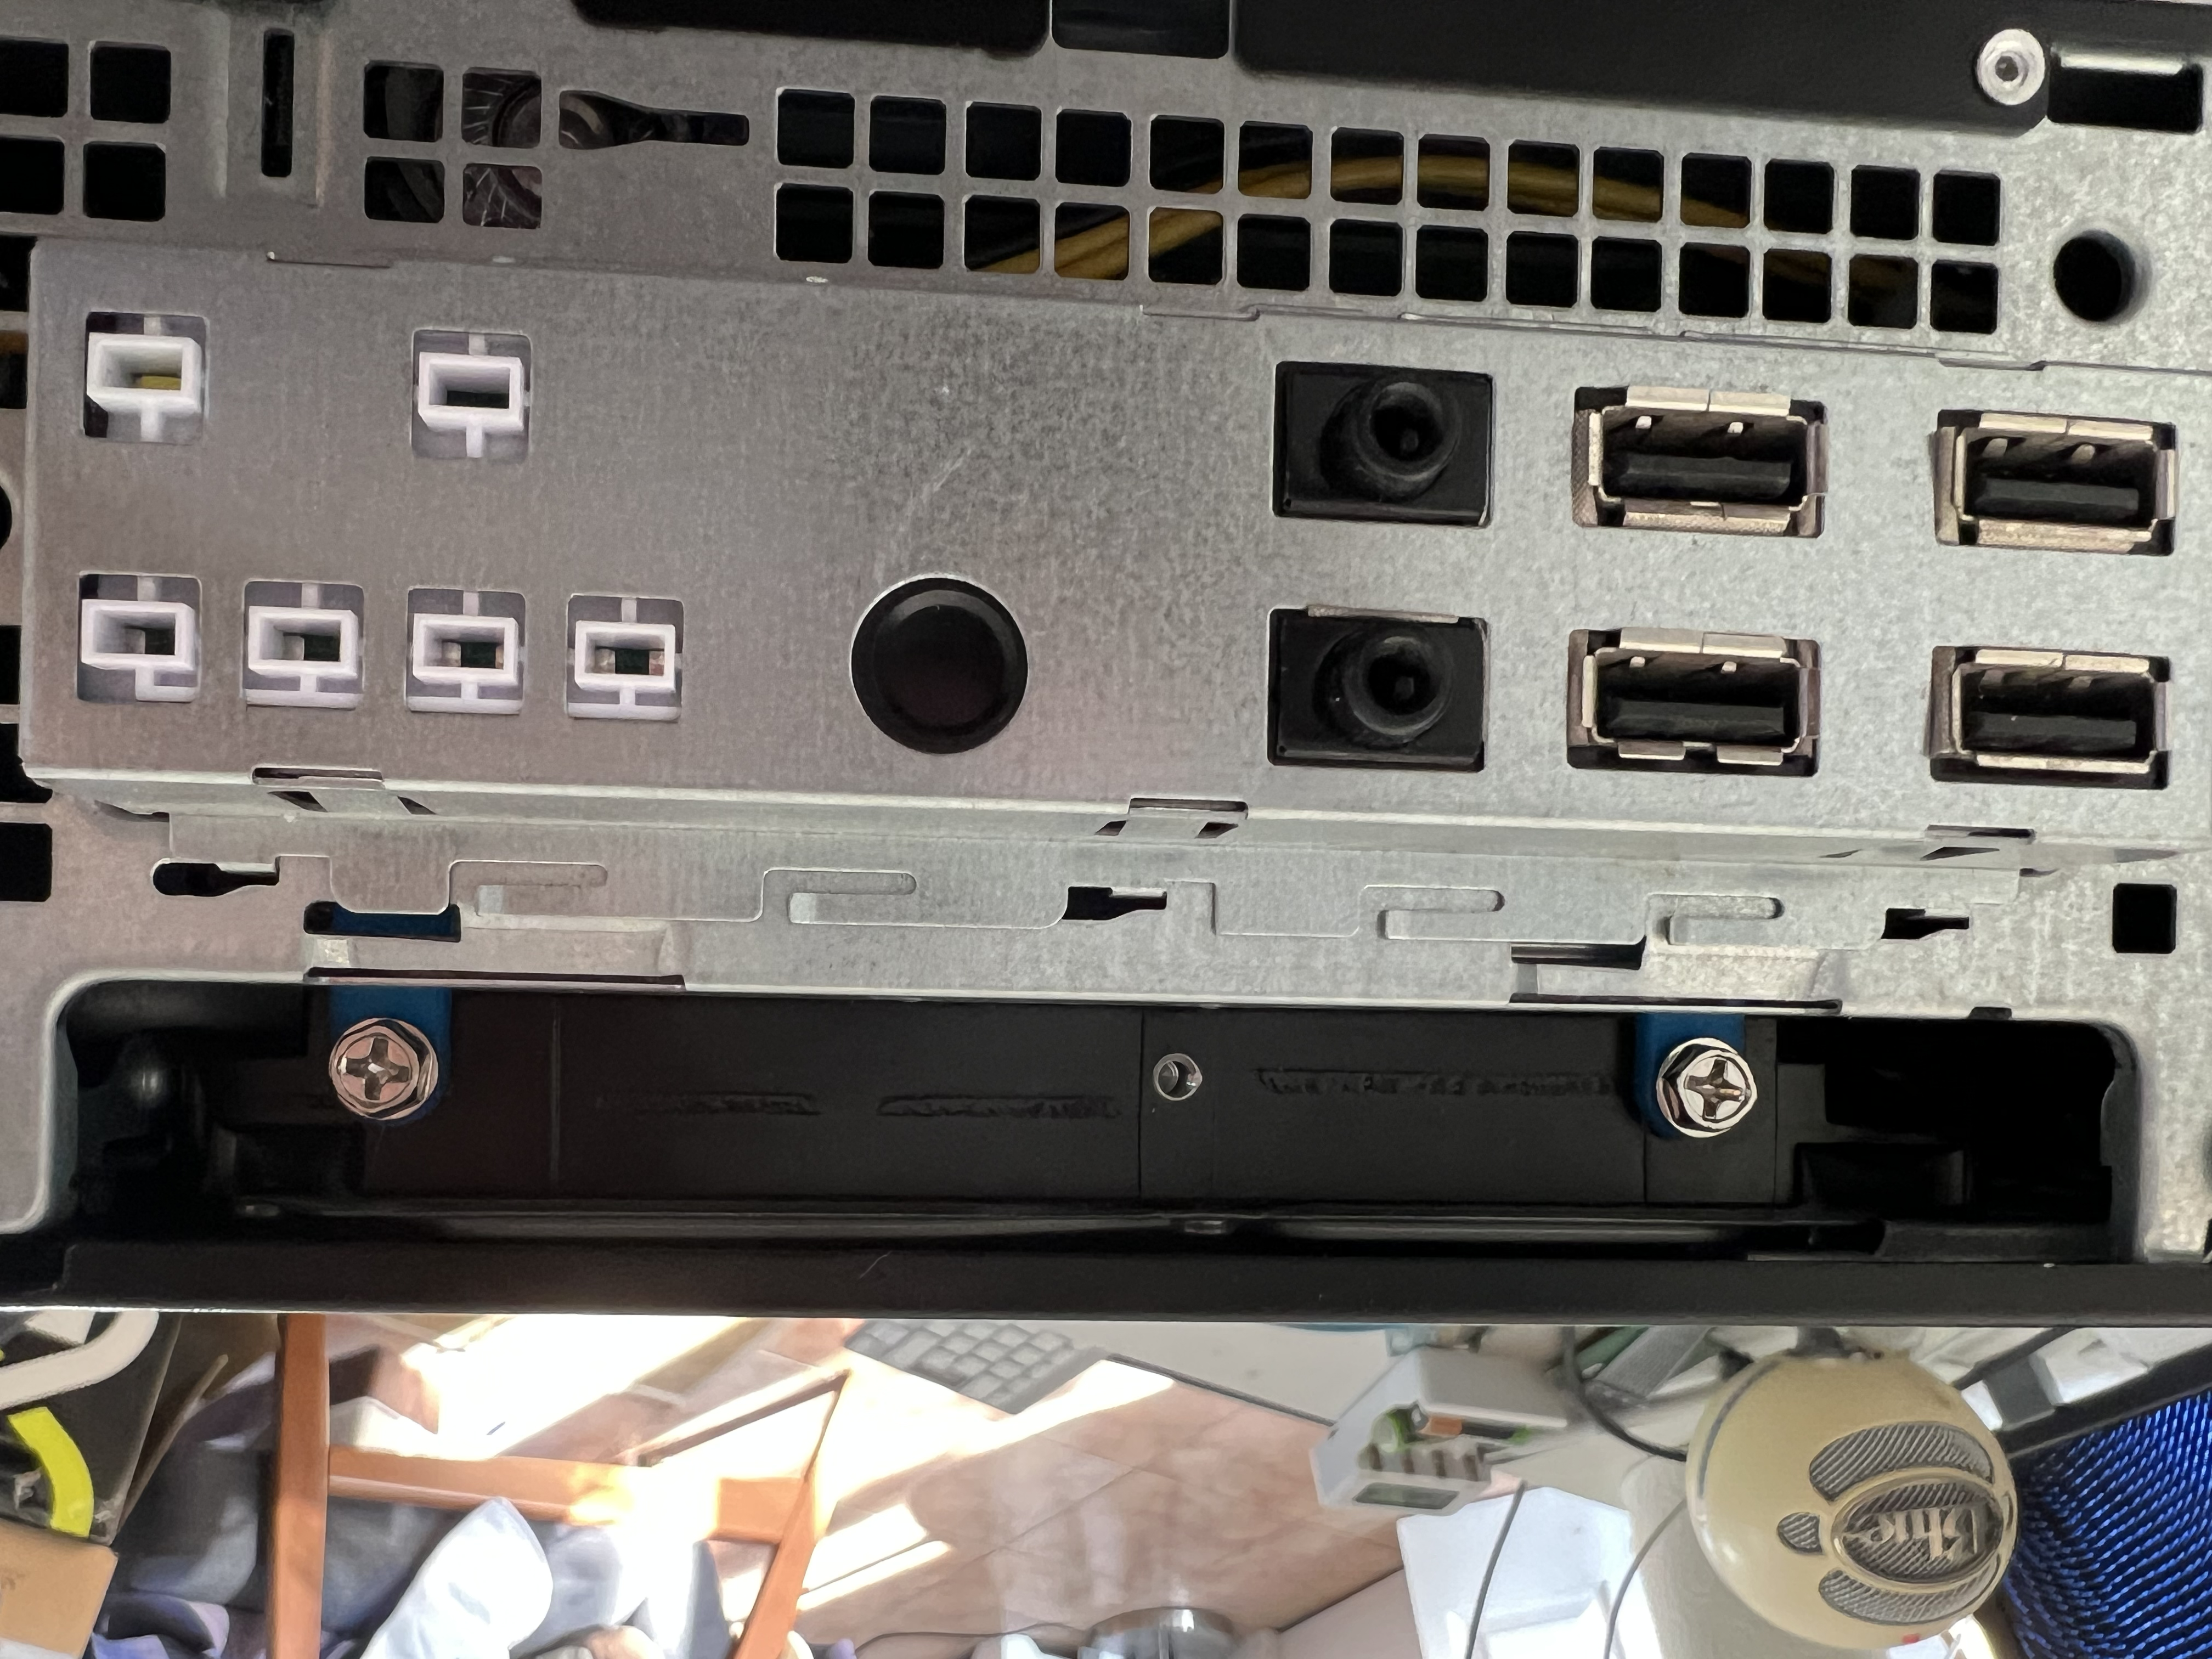
The same view but with the lit fitted.
Parts list
If you want to make this mount exactly as I did then you will need these parts, or metric equivalent. Just bear in mind that it could be improved, so if you’ve got access to a 3d design program and the willingness it could be better. Let me know if you release an improved model and I’ll link it here.
- 4 x 6-32 UNC * 50mm bolts
- 5 x 6-32 UNC nuts (or 2 x if you print out spacers for the risers, see first image and description in “The finished mount in action”)
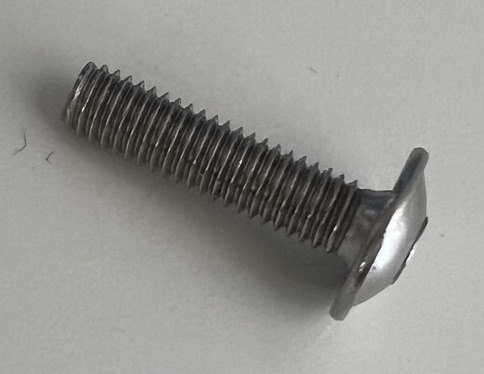
- 4 x M3 * 12mm flat head bolts for the SSD
- 10 x standard HD mounting screws (8 for the HDs, 2 for the base)
- SATA cables
- A SATA power splitter
The SSD bolts looks like this:
Printing instructions
The design is printed in parts. Print one each of all parts you see in the image above, except you’ll need four of the risers (the long thing sticking down on the bottom left of the image) and four of the SSD mounting spacers if you’re using the same m3 bolts as me. Adjust or omit these if you have different length M3 bolts.
Any 3d printer should work, but all this was printed on a Prusa i3 MK3S, if you’re looking for your own 3d printer then the Prusa i3 MK4 would be a great option.
Things I’d do differently
- The HD Screws aren’t really long enough for going through a nut and two layers of 3d print, so where I’ve used them to connect the base of the mount the print is a little thin to allow for all the thread to pass through and bite into the thread in the nut. I could have used different screws/bolts or could likely have done this without any screws at all with an interlocking design, but this works and I don’t want to re-design it.
- Make the SSD mounting bolt head recesses very slightly deeper.
- Made the nut traps tighter, the nuts were loose which made installation a pain.
- Re-designed to use less 3d printing and to take advantage of the HDs inherant stiffness. The HDs are made of metal, and I didn’t need anywhere near as much 3d printed structure to keep them in place, I could have relied on the inherant stiffness of the drives more.
- Made the risers tighter so they didn’t fall off the long bolts on installation.
- Made the base installable first then the HDs bolt onto that, as it stands there’s a fiddly installation process and you have to remove pretty much the whole thing to change a drive.
- The riser closest to the power button interferes with the HD if you offset it from the base the correct amount, I’d re-design that (see first picture and description under “The finished mount in action”).
Things to test later
I’ve fully assembled the mount, powered it on, installed TrueNAS and started using it as a file store, so it works. A couple of things I’d like to test at some point but haven’t got round to:
Heat
Adding more things into the case means less airflow. I think there’s still enough (below the mount, round the side near the case fan, between the hard drives) that it’s not going to overheat, but I’ll be monitoring the heat using the TrueNAS UI.
Power usage
The PSU is 64W I think, but seems to be fine driving two mirrored 5400 RPM drives and an SSD. I left my power monitor on my boat though so will test when I get the chance.
Downloads
The Fusion 360 design file:
STL:
- Base
- Front top
- Back top
- Riser (print x 4)
- SSD Offset (print x 4)
Conclusion
I’ve said it before, but it’s worth repeating. This mount works just fine, the drives are well fixed in place, the cables stay in, the case lid closes. However, designing stuff isn’t my day job and this design has a number of issues that if someone with more time and who is better at 3d design wanted to build on then it could be greatly improved. If I were to print a new version of this I’d probably alter the design quite a lot.
All that said, if you want to print this, and have the parts, then I don’t see any reason why it shouldn’t also work for you, it’s working for me.
Let me know if you use this or improve it! Contact details on the homepage.