
I make sourdough bread usually at least once a week and sometimes post pictures of the result to Twitter and get asked pretty frequently about my technique. There’s a lot written about sourdough bread on the Internet these days, and plenty of YouTube videos on the subject too, but my technique is slightly different to many of them in that it is simple and takes the smallest amount of time possible while still getting great results. I don’t have the time to dedicate an entire week to the creation of a loaf of bread, I haven’t the patience to softly sing to the dough five times a day, and will not be spending several hours gently cupping the proving basket whispering encouraging thoughts long into the night.
I have other stuff to do. So, my technique reqires the minimum amount of time. In total a loaf using my technique takes about:
- Day 1: about 10 minutes total.
- Day 2: 40 minutes to bake + oven pre-heat time.
Even this seems like a long time, but bear in mind that a lot of this time is spent waiting, for instance the baking and oven warming which is time you can spend doing other important stuff like making lunch, or endlessly doom-scrolling through Twitter.
Though it’s fashionable to add your entire life story as the preamble to any recipe posted on the Web these days, let’s draw a line under this introduction and move on to the method. If you’re pushed for time to make bread then you’re not going to want to read about how a particularly nutty focaccia I ate when I was four set me on the path to posting marginally iterative recipes that I’ve made my own “with a twist” many years later.
The starter
You’re going to need a starter. If you’ve not got one already, head over to my article on making one, otherwise, read on!
The Method
You will need:
- 250g strong white bread flour
- 7g salt (about 1 teaspoon for table salt)
- 115g water (I just experimented and got to this point, vary the water for the flour you use)
- 1 or 2 teaspoons honey (optional)
- 150g starter
I recommend starting off with white bread, it seems easier to make, but for wholemeal replace the flour above with:
- 200g strong white bread flour
- 50g wholemeal flour
- 30g mixed grains and seeds
Day 1
Stir the starter before use in case it has separated at all. If any water has accumulated, stir that in too. Put all the ingredients into a bowl and mix. Once mixed you need to knead it. I use a stand mixer (kitchenaid) on setting 2 for 5 minutes. Hand kneading works too, but it’s harder to fiddle with your phone while you do it and you’ll need to knead for more like 10 minutes.
While the bread is kneading, or afterwards if you’re doing it by hand, top up the starter with 75g flour and 75g water. If you used more than 150g starter, for instance if you made a larger loaf, alter these quantities respectively. Mix, cover with your cloth and put back in the fridge.
After kneading do a few stretch and folds (see elsewhere for description), then leave the dough in the bowl covered with a slightly damp tea towel at room temperature for several hours, eight is good to aim for. I often make bread sometime between 11 AM and early evening, then deal with it at about 10PM, but it’s pretty robust. You can leave it a longer or shorter time and it should be fine. Don’t leave it out overnight, it will develop a dry crust. If you forget and do leave it out overnight though, don’t worry about it, you can still use it, it might just not be as good.
That evening, take the dough and do some “stretches”. Take one side of the dough, stretch it over to the other side and attach. rotate the dough, repeat. You should start to feel the dough slightly stiffen or harden. This step doesn’t take too long, just get a feel for it.
Now, put it in the fridge. I use a banneton, they’re about £12 on amazon, but you can probably use some other dish. Flour the inside of it, drop the dough top of the loaf side down in the receptacle, cover, place in the fridge overnight.
These steps in total will take about 10 minutes for the initial mix and a few minutes for the step in the evening.
Day 2
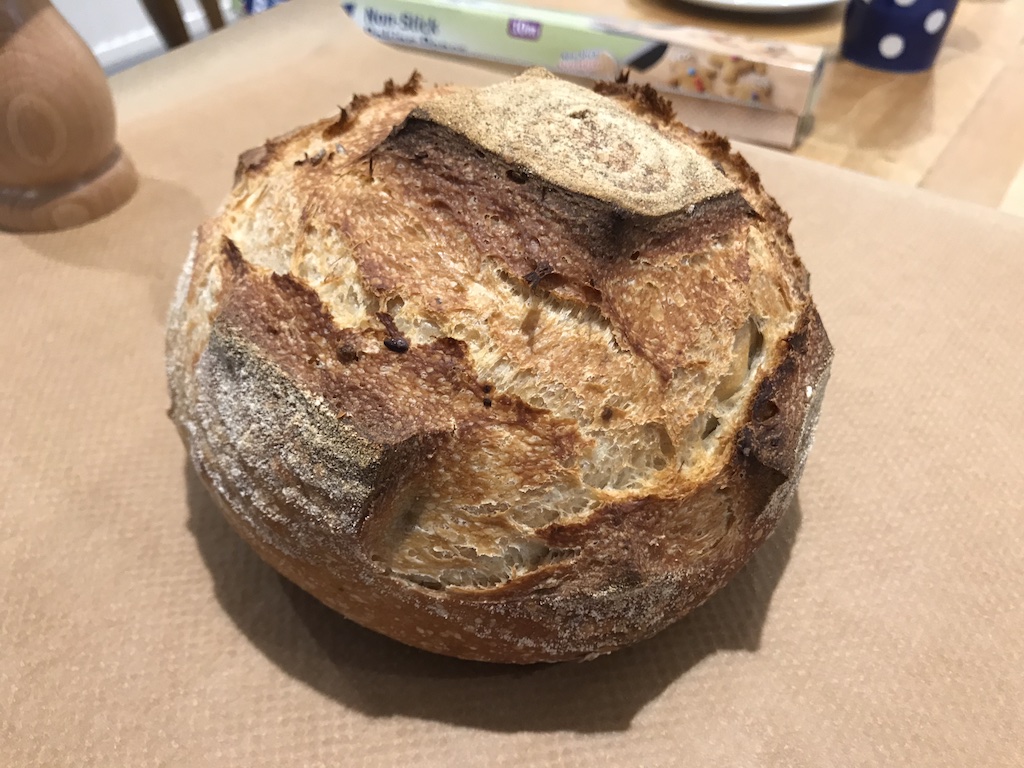
A finished loaf.
The next day at some point (there’s no hard rules about how long to leave it), take the dough out of the fridge, pre-heat the oven to 250°C with a lidded dutch oven inside or similar, lined with baking paper.
When the oven is up to temperature take the dough out of the banneton, score it to help it rise (I find a serrated knife works best for this) then plop into the hot cooking pot. Put the lid on, put it in the oven then turn the oven down to 200 (if you forget this step you will end up with a sourdough rock) and set a timer for 20 minutes.
When 20 minutes is up, remove the lid and set the timer for 20 minutes again. When that timer is up it’s done, take everything out of the oven and place the bread on a wire cooking rack. Or just balance it on the handle of the cooking pot, this isn’t a cooking show, no-one cares.
Leave it to mostly cool down before you cut it to prevent it from drying out as the steam escapes.
Tips and examples
Keeping it
The bread is best on the day of baking, but leave it to cool before eating it. If you want to keep it longer than one day I recommend slicing it and freezing it. It makes great toast later.
Tips
- Use good quality strong or very strong white bread flour if you’ve got it. It’s harder to get it to work with “fancy”, darker or lower quality flours. I use this: https://www.shipton-mill.com/bulk-shop/canadian-strong-white.htm
- If you use an enamelled dutch oven you may destroy the enamel over time in the hot oven, use a cheaper le crueset knock-off, or one without enamelling.
- Don’t stress timings too much, a few hours either way is probably fine on any of the steps. It should work around your schedule.
- Keep the starter in the fridge.
- Different flours need different amounts of water, you just have to experiment.
Examples
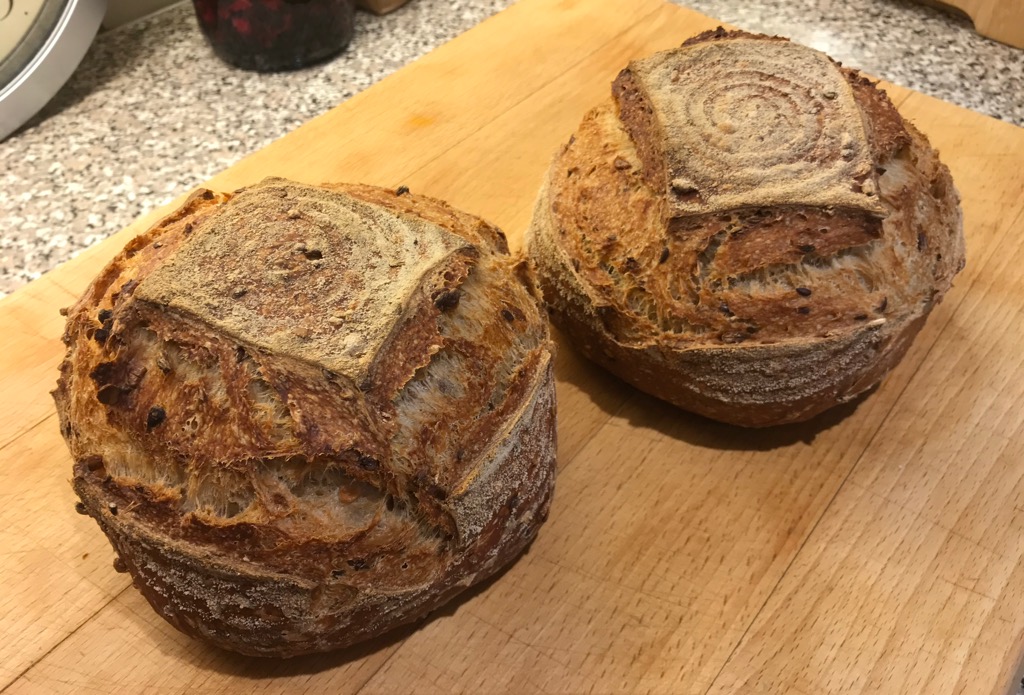
There’s some photos of what the end result should look like on my almost never updated instagram:
https://www.instagram.com/willj9000
or twitter, for example:
https://twitter.com/will_j/status/1265263352244289537/photo/1
If you want to make more than one loaf, or a larger loaf
Start to feed the starter with 50/50 flour and water a few days in advance until you have enough starter to take out the amount you will need while still leaving about 150g that you can then feed and put back in the fridge.